


Blog Summary: A repeating pattern is a single design tile that tiles seamlessly across a product surface, letting print businesses turn one artwork file into dozens of sellable products. This guide explains what repeat pattern design is, the six pattern types used in commercial printing, a step-by-step production workflow, and how Web-to-Print platforms let customers personalize patterns without design help.
Repeating patterns show up everywhere in commercial print: gift wrap, apparel, wall decor, packaging, mugs, and branded corporate merchandise. Designing one used to require dedicated textile design training. Today, modern pattern design software. lets a print business build, test, and sell repeat patterns without hiring a specialist designer for every SKU.
Demand for this kind of personalization keeps climbing. Industry research shows the global personalized products market has grown well past $30 billion in 2025, and more than half of consumers say they will pay a premium for products that feel individually made for them. That shift is not a passing trend. consumer expectations shift toward more personalized products, print businesses that can deliver pattern-based customization at scale hold a clear advantage over shops that still treat every order as a one-off design job.
For print service providers (PSPs), this is not just a design trend. It is an operational shortcut. One well-built pattern tile can generate hundreds of product variations, complete with live previews, without a designer touching each order individually. This blog covers what repeat pattern design actually is, the main pattern types used in commercial printing, a practical build-to-export workflow, and how to turn pattern libraries into a repeatable revenue stream inside your Web-to-Print storefront.
What Is Repeat Pattern Design in Commercial Printing?
Repeat pattern design is the practice of creating a single graphic tile that can be duplicated edge to edge, in every direction, without visible seams or breaks. When tiled correctly, the eye reads it as one continuous surface design rather than a grid of repeated copies. Textile designers have used this technique for centuries. What has changed is how the tile gets built, tested, and applied to products.
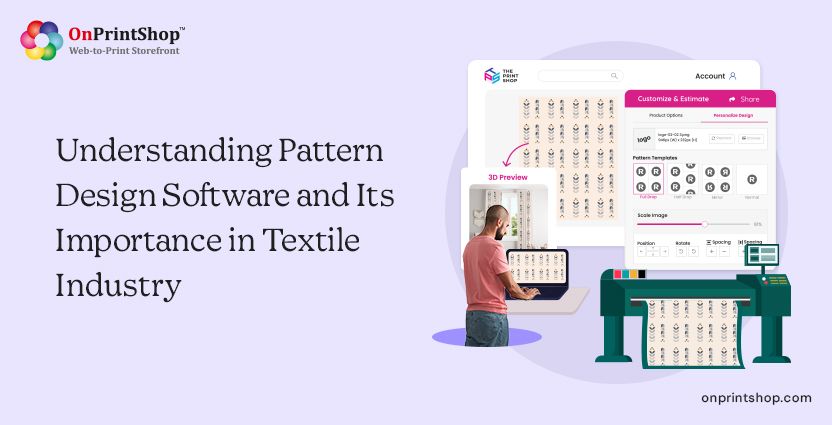
For a PSP, the business value of a repeat pattern goes well beyond looks. A single tile can drive personalization across an entire product catalog without a designer creating a unique layout for every item. Once a pattern is uploaded to a storefront, it can appear instantly on wallpaper, wrapping paper, curtains, bedsheets, mugs, phone cases, photobook covers, packaging, signage, and dozens of other SKUs through automated live previews.
This is what makes pattern libraries valuable from a catalog-growth standpoint: they let a print shop add new product categories without adding proportional design labor. That is also why understanding pattern design software has played an important role in the textile industry for the last decade, and why the same automation logic now extends far beyond fabric into general commercial print.
The 6 Repeat Pattern Types Every Print Business Should Know
How a tile repeats changes the entire look of the finished product. In a top-notch Web-to-Print software, this matters even more because a single pattern needs to scale cleanly across business cards, wide-format signage, packaging sleeves, and tote bags without manual repositioning for each size. Below are the six repeat styles used most often in commercial print, along with where each one performs best.
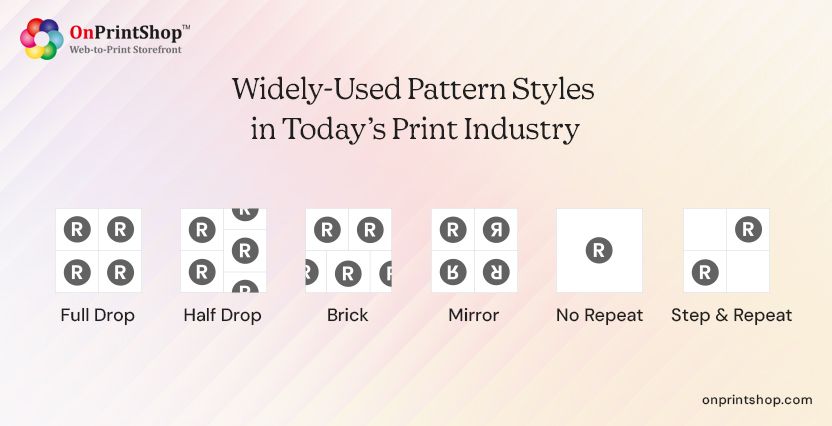
Full Drop
A full drop pattern repeats identically along both the horizontal and vertical axes, similar to a grid of floor tiles. It is the simplest and most predictable repeat style, which makes it fast to produce and easy to preview accurately at any size.
Full drop works well for geometric prints, corporate branding patterns, monograms, and any design that needs to stay visually consistent across a large surface, such as wallpaper panels or wide-format display rolls.
Half Drop
A half drop pattern offsets every alternate row by half the tile width, which breaks up the rigid grid feel of a full drop. The staggered layout hides repeat lines more effectively and produces a flowing, organic look.
Half drop repeats are common in floral motifs, abstract surfaces, wrapping paper, apparel, and upholstery, where visual movement adds character to the finished piece.
Brick
A brick repeat shifts alternating rows horizontally instead of vertically, typically by a third or half of the tile height, similar to the offset of bricks in a wall. It works well for stripes, icon grids, or any motif that benefits from horizontal rhythm. Because a brick repeat reads clearly from a distance, it is a strong choice for banners, signage, and large-format packaging.
Mirror
A mirror repeat flips the tile along a vertical or horizontal axis, creating a symmetrical reflection of the original artwork. This technique gets the most visual value out of a small amount of original art, turning one tile into two or four visual variations.
It works especially well with organic textures such as brushstrokes, watercolor, feathers, or leaves, where natural irregularity adds interest rather than looking mechanical.
No Repeat (Single Placement)
A no-repeat design is a standalone graphic used once, rather than tiled. It is technically not a repeating pattern, but it belongs in this list because most Web-to-Print storefronts let customers toggle between full-bleed repeat patterns and a single centered graphic.
A packaging box, for example, might use a hero illustration on the lid while the rest of the surface stays clean. Supporting this option gives customers more layout flexibility inside the same product template.
Step and Repeat
A step-and-repeat pattern places a logo or small motif at even, consistent intervals across the surface, the format most associated with event backdrops, promotional walls, and branded gift wrap.
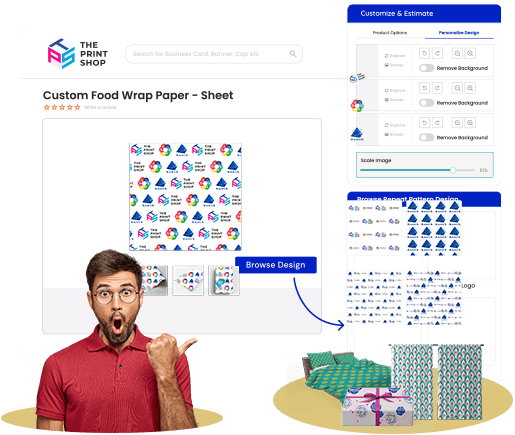
In a Web-to-Print system, step and repeat is especially efficient because a customer can upload a single logo and immediately preview it applied across banners, boxes, or tissue paper, with no manual layout work required.

How to Design a Repeating Pattern for Print: 7-Step Workflow
Building a print-ready repeat pattern takes a mix of creative judgment and technical precision. Here is the production workflow used by professional pattern designers and modern Web-to-Print studios.
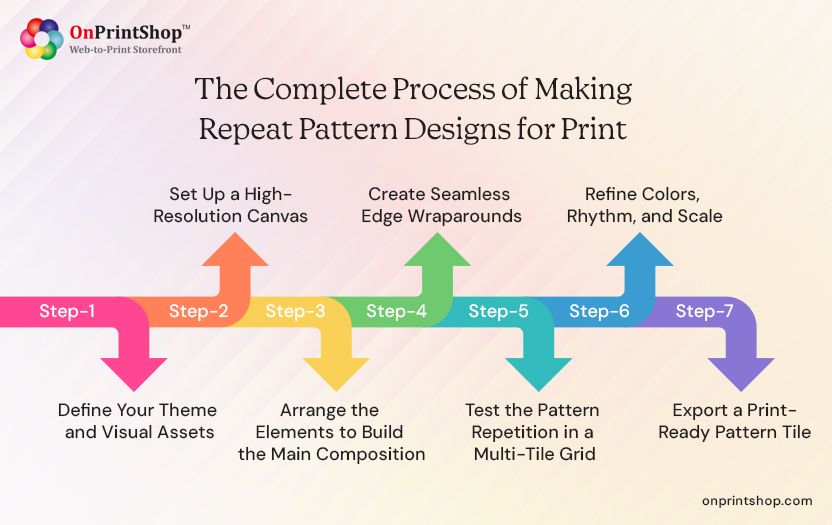
Step 1: Define the Theme and Core Visual Elements
Start by selecting the specific illustrations, icons, shapes, or brand motifs that will make up the pattern. Decide early whether the pattern should read as playful, elegant, minimal, or seasonal, since that decision shapes every element that follows. Most designers sketch several directions before locking in the final set of assets for the tile.
Step 2: Build the Tile at the Correct Resolution
Set up the tile before placing any artwork. For print output, a tile sized between 1000 and 4000 pixels (roughly 10 to 30 cm) at 300 DPI is a reliable starting point. Build in CMYK from the beginning so on-screen color matches production output. Getting the tile dimensions and color mode right at this stage prevents costly rework later.
Step 3: Arrange Elements for Visual Balance
Place the motifs inside the tile so the eye moves smoothly across the composition, with no crowded clusters or empty gaps. The arrangement should match the intended repeat style, whether that is a straight grid, half-drop, or brick layout.
Spacing issues that look minor in a single tile become obvious once the pattern repeats hundreds of times across a full surface, so it pays to check density carefully at this stage.
Step 4: Build Seamless Edge Wraparounds
This is the step that actually makes a pattern "seamless." Any element that touches one edge of the tile must reappear at the exact matching position on the opposite edge, both left-to-right and top-to-bottom. Repeat pattern software with the right features can automate this alignment, but without it, designers have to manually copy and nudge elements into mathematically precise positions. Get this step right and the tile joins itself cleanly in every direction, with no visible seam.
Step 5: Preview the Pattern Across a Multi-Tile Grid
Never approve a pattern from a single tile view. Duplicate the tile into a 2x2 or 3x3 grid, then zoom out to check for seams, gaps, or unintended focal points that only show up once the design repeats. Small imbalances that are invisible in one tile often become obvious at scale.
Using an intuitive online designer studio makes this step significantly faster, since it renders a live, zoomed-out preview instantly instead of requiring a manual test export.
Step 6: Fine-Tune Color, Rhythm, and Scale
With the structure locked, adjust color palette and spacing to match the product category. Packaging and signage typically need higher contrast and bolder shapes, while stationery and event-related products often work better with softer tones and more generous spacing.
Test each repeat style, such as step and repeat, full drop, or half drop, at multiple scales to confirm it holds up on both small items like keychains and large formats like fabric yardage or banners.
Step 7: Export a Print-Ready File
Export the finished tile in a production-ready format such as PDF, TIFF, or high-resolution PNG, depending on your print method and storefront requirements. Confirm resolution, color mode, and bleed settings match your production standards before export.
Once uploaded to your customizable Web-to-Print storefront, the tile becomes reusable across the catalog: customers can preview it live, scale it, apply it to multiple products, and generate print-ready output automatically.
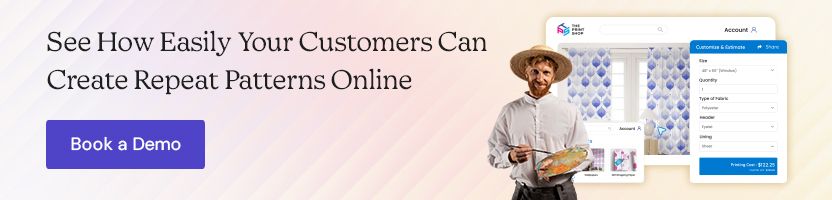
Letting Customers Design Repeat Patterns Online
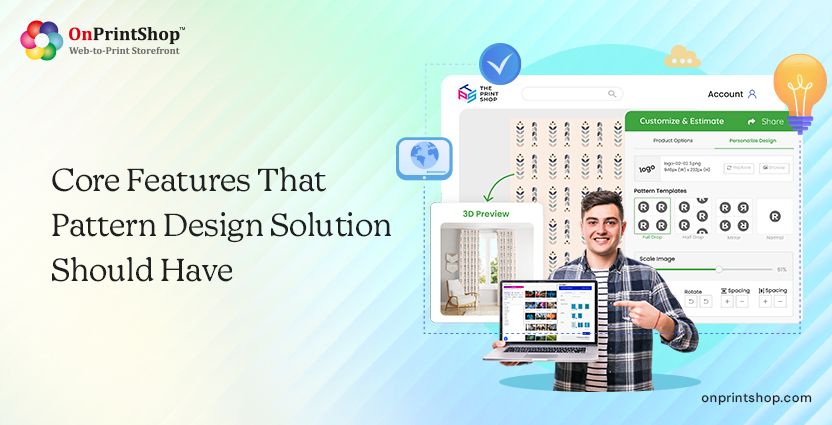
A modern Web-to-Print platform handles pattern design, live preview, and production file generation in one place. Instead of designing offline and re-uploading files for every revision, customers and staff can build patterns directly in the browser and see the result on real product mockups instantly.
That live preview matters because a pattern that looks balanced at tile size can look completely different once it repeats across a large product. Seeing the result in real time, before checkout, prevents misalignment, overcrowding, and empty-space issues that would otherwise show up only after printing.
Once a customer finalizes a design, the platform automatically applies correct bleed, resolution, and color settings and generates a production-ready file. That removes the risk of incorrect submissions and keeps output consistent whether the same pattern is used on packaging, apparel, stationery, or signage.
The bigger shift is self-service. Customers can now upload a logo, adjust a layout, or pick a pattern variation without waiting on a designer, which cuts turnaround time and turns pattern-based products into a scalable, low-touch revenue line for the print business.
Best Practices for High-Quality Pattern Printing
A strong pattern design can still fail at the print stage if production details get overlooked. These practices help keep output consistent from screen to final product.
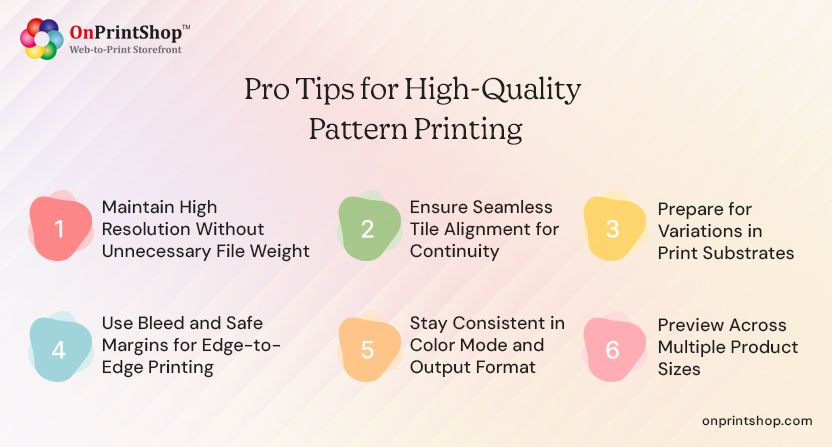
Keep Resolution High Without Bloating File Size
A pattern needs to stay sharp whether it prints on a small business card or a large packaging sheet. Building at 300 DPI or higher is the standard baseline. Vector artwork is the safer choice when possible, since it stays crisp at any size without increasing file weight. When raster textures are required, crop and compress efficiently so the master tile stays high quality while the exported production file remains manageable.
Test Tile Alignment Before Approving the Pattern
Visible seams are the fastest way to break the illusion of a seamless repeat. Zoom in and check all four edges of the tile at multiple scales. Applying the tile to a larger test canvas makes horizontal and vertical mismatches easy to spot.
After correcting alignment, preview the pattern on several product sizes, since unusual dimensions can reveal imbalances that a standard tile view misses.
Account for How Substrates Affect Color
Different materials absorb ink differently, so a pattern that looks vibrant on coated paper can appear muted on fabric, canvas, or kraft packaging. Designers producing for multiple substrates should adjust color curves or generate alternate color profiles per material, then proof or simulate the result before running full production.
Build In Bleed and Respect Safe Margins
Any pattern that reaches the edge of a product, such as packaging or signage, needs bleed to prevent white edges from appearing after trimming. Extend the pattern beyond the final cut line to give production equipment tolerance during finishing, and keep essential elements inside the safe margin so nothing gets clipped if a customer orders a different size.
Standardize Color Mode and File Format
RGB works for digital screens but not for print. Every production file should export in CMYK or as an ICC-profiled PDF to protect color accuracy. PDF/X, TIFF, and high-resolution PNG are the most reliable formats for balancing color fidelity with production compatibility, and a consistent export process keeps every stage, from working file to RIP, reading the same artwork correctly.
Preview the Pattern Across Every Product Size You Sell
A pattern that looks perfect on a small item can feel overwhelming, or too sparse, on a larger surface. Reviewing mockups across your full size range helps you catch scale and spacing problems before a customer does.
Most modern Web-to-Print systems generate these mockups automatically across mugs, apparel, stationery, packaging, and signage, which shortens proofing cycles and improves the buying experience.
How Print Businesses Profit from Repeating Pattern Design
Repeat patterns give a Web-to-Print business a direct commercial advantage: one tile can generate dozens of sellable SKUs without a separate design layout for each product. That efficiency lets a shop expand its catalog faster, launch seasonal collections on shorter timelines, and add niche product lines without adding proportional design overhead.
Customers benefit from the same efficiency in a different way. Instead of starting from a blank canvas, they apply an existing pattern, adjust scale or color, preview it live, and check out, often in minutes rather than days.
On the production side, pattern automation removes manual steps from fulfillment. Once a pattern is uploaded, the system applies it across each product template, generates the correct output files, and routes the order to print without a human touching every file individually.
Some print businesses go a step further and monetize the pattern library itself, selling digital pattern packs, designer-uploaded collections, or premium personalization add-ons as a standalone revenue line. Across all of these models, the outcome is the same: broader catalog depth, faster fulfillment, and more revenue generated from less design labor per order.
Wrapping It Up!Repeat pattern design has moved from a specialist textile skill to a core catalog-growth tool for modern print businesses. With a solid workflow and easy-to-use pattern design software, one well-built tile can power dozens of products without adding design time to every order.Customers get instant, self-serve personalization, and your production team gets automated, error-resistant output with fewer proofing rounds. The result is a faster path from design to order and a more scalable revenue stream from every pattern collection you launch.If you want to add pattern-driven personalization to your storefront, grow catalog depth, and give customers a better design experience, book a 1:1 live demo of our Web-to-Print solution for your print business today!